

Have you ever dreamed of giving your ride a whole new look without breaking the bank? Well, buckle up because I’m about to take you on a wild ride through the world of DIY car wrapping! 🚗💨
As a car enthusiast who’s been in the game for years, I’ve seen my fair share of automotive trends come and go. But let me tell you, vehicle vinyl wraps are here to stay. They’re like a facelift for your car, minus the scary surgery part!
I remember the first time I attempted a DIY car wrap. Man, was I in for a surprise! It’s not as easy as those YouTube videos make it look, but with the right techniques and a bit of patience, you can transform your ride from drab to fab. So, grab a coffee (or an energy drink if you’re feeling wild), and let’s dive into the nitty-gritty of car wrapping!
Why Choose DIY Car Wrapping?
Before we get our hands dirty, let’s talk about why you might want to wrap your car in the first place:
- Car wrap cost savings: Compared to a professional paint job, wrapping your car can save you a bundle.
- Customization: Want a matte finish one month and a chrome effect the next? With wraps, you’re not committed to one look forever.
- Protection: A vinyl wrap can actually protect your car’s original paint from scratches and UV damage.
- Resale value: When it’s time to sell, just peel off the wrap and your car’s original paint will be pristine!
Getting Started: Preparation is Key
Alright, let’s get down to business. The secret to a successful DIY car wrap? Preparation, preparation, preparation! Skipping this step is like trying to bake a cake without preheating the oven – it’s just asking for trouble.
Gather Your Arsenal: Car Wrap Tools and Materials
First things first, you need to assemble your car wrap tools. Here’s what you’ll need:
- High-quality vinyl wrap (I swear by 3M and Avery)
- Squeegee with felt tip
- Heat gun (trust me, you’ll need this)
- Utility knife or Snitty cutting tool
- Cutting tape or knifeless tape
- Isopropyl alcohol (IPA) and lint-free towels
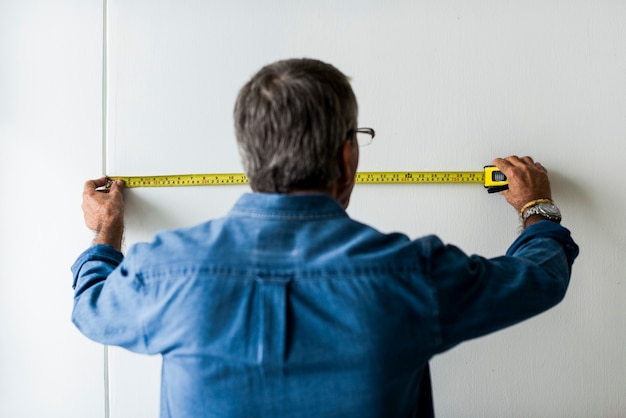
- Measuring tape
- Gloves (cotton or latex)
- Infrared thermometer (optional, but super helpful)
Prepping Your Workspace
Now, let’s talk about your workspace. You want a clean, dry area with good lighting. I learned this the hard way when I tried wrapping my first car in my dimly lit garage. Let’s just say the results were… interesting. 😅
Ideally, you want to work indoors in a warm area. Temperature plays a big role in vinyl wrap application, so aim for a comfortable room temperature.
Cleaning Your Car: The Make-or-Break Step
I can’t stress this enough: a clean car is crucial for a successful wrap. Here’s my tried-and-true cleaning process:
- Wash the car thoroughly with soap and water
- Remove all dirt, grease, and wax
- Use a grease and wax remover for stubborn residues
- Finish with isopropyl alcohol for a final wipe-down
- Pay extra attention to edges, seams, and hard-to-reach areas

The Main Event: Applying Your Car Wrap
Alright, you’re all prepped and ready to go. Now comes the fun part – actually wrapping your car!
Measure Twice, Cut Once
Start by measuring the panel you’re wrapping. Always cut the vinyl larger than you need – trust me, it’s way easier to trim excess later than to try and stretch a too-small piece.
Remove Obstacles
Take off any trim, moldings, or handles that might get in your way. It’s a bit of extra work, but it’ll make your life so much easier in the long run.
Start with the Easy Stuff
Begin with larger, flatter panels like the hood or doors. It’s like learning to swim – you don’t start in the deep end!
The Application Process
- Find your center: Identify the center of the panel as your starting point.
- Peel and stick: Peel back the liner and position the vinyl.
- Work from the center out: Start from the middle and work your way outwards.
- Squeegee like you mean it: Use moderate pressure and overlap each stroke to banish those pesky air bubbles.
Heat is Your Friend (and Sometimes Your Enemy)
The heat gun is your secret weapon for making the vinyl pliable around curves and edges. But be careful – too much heat can stretch or even melt the vinyl. Use an infrared thermometer if you have one to keep an eye on the temperature.
Trimming and Tucking
Once you’ve got the vinyl applied, it’s time for some precision work:
- Trim the excess vinyl, leaving about 1/4 cm for tucking.
- Use heat to soften the vinyl for tucking.
- Tuck edges carefully, paying extra attention to corners and complex curves.
Finishing Touches: Making Your Wrap Look Pro
You’re in the home stretch now! Here’s how to give your wrap that professional finish:
Post-Heating
Apply heat evenly across the wrapped surface. This helps set the adhesive and draws the vinyl tighter to the surface. It’s like ironing your clothes – it just makes everything look better!
Edge Sealing
For a seamless finish, heat and press edges into place. Aim for a 90-degree angle on edges and make sure there’s no loose or floating material at the extremities.
Final Inspection
Clean the surface with alcohol and inspect for any bubbles, wrinkles, or imperfections. Address any issues immediately – don’t put it off or you’ll regret it later!
Common Pitfalls and How to Avoid Them
Let’s talk about some DIY wrap mistakes to avoid. I’ve made plenty of these myself, so learn from my fails!
- Rushing the process: Car wrapping is not a race. Take your time and do it right.
- Skimping on quality: Cheap vinyl might save you money upfront, but it’ll cost you in the long run. Stick with reputable brands.
- Ignoring the weather: Temperature and humidity can affect vinyl application. Aim for a dry, moderate climate.
- Forgetting to post-heat: This step is crucial for activating the adhesive and ensuring longevity.
- Overlooking edges and curves: These areas require extra attention and often benefit from using knifeless tape.
Maintaining Your DIY Car Wrap
Congrats! You’ve successfully wrapped your car. But the journey doesn’t end here. To keep your wrap looking fresh, follow these car wrap maintenance tips:
- Hand wash only – no automatic car washes!
- Use pH-neutral soap and avoid harsh chemicals.
- Don’t wax your wrapped car – it’s unnecessary and can damage the vinyl.
- Address any lifted edges promptly to prevent further peeling.
Is DIY Car Wrapping Right for You?
Now, I know what you’re thinking – “This sounds like a lot of work!” And you’re not wrong. DIY car wrapping is a time-consuming process that requires patience and attention to detail. It’s normal for first-time DIYers to take several days to complete a full wrap.
If you’re not confident in your abilities, consider starting with smaller panels or even practicing on old appliances. There’s no shame in seeking professional help if you find the task too daunting.
Wrapping It Up (Pun Intended)
So there you have it – your ultimate guide to DIY car wrapping. From vehicle vinyl wrap selection to car wrap installation techniques, we’ve covered it all. Remember, practice makes perfect, and even the pros had to start somewhere.
Whether you’re going for a sleek matte finish or a bold color change wrap, the key is to take your time, follow the steps, and don’t be afraid to make mistakes. After all, that’s how we learn!
Now, I want to hear from you! Have you tried wrapping your car? What challenges did you face? Or if you’re planning to give it a go, what design are you thinking of? Drop a comment below and let’s chat!
And hey, if you found this guide helpful, why not share it with your car-loving friends? Who knows, you might inspire the next great car wrapper!
Stay safe, have fun, and happy wrapping! 🚗✨